Every construction crew, maintenance team, and DIY homeowner who uses a hand caulking gun has run into the same problem: sealant that drips, beads that look uneven, and joints that fail within months. Most of these problems trace back to a handful of caulking gun mistakes that are easy to prevent once you know what to look for.
The five mistakes below are the ones that show up most often on job sites, in renovation walkthroughs, and in product support questions from distributors and contractors. Each one wastes material, slows down work, and reduces the quality of the finished seal. More importantly, each one maps to a specific feature or technique that the right caulking gun and a few small habits can fix.
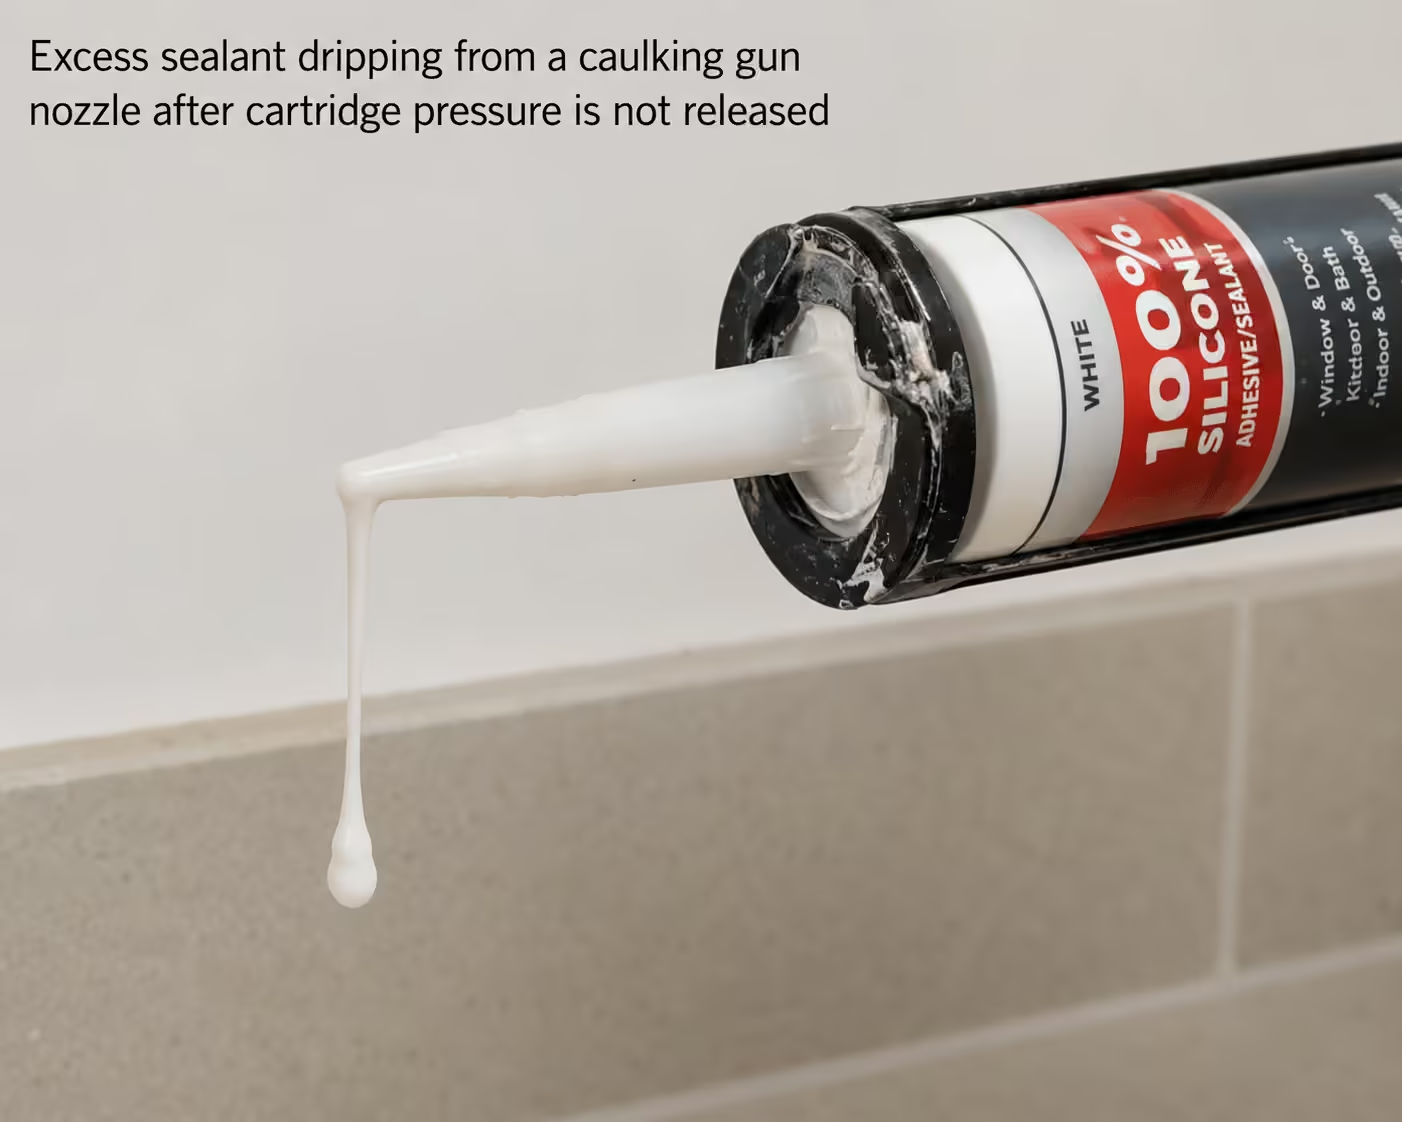
Mistake 1: Not Releasing the Pressure After Each Bead
The most common source of dripping is leftover pressure inside the cartridge. When you stop squeezing the trigger on a standard ratchet-rod hand caulking gun, the plunger stays pressed against the back of the tube. Sealant keeps oozing out of the nozzle for several seconds after you think you have stopped.
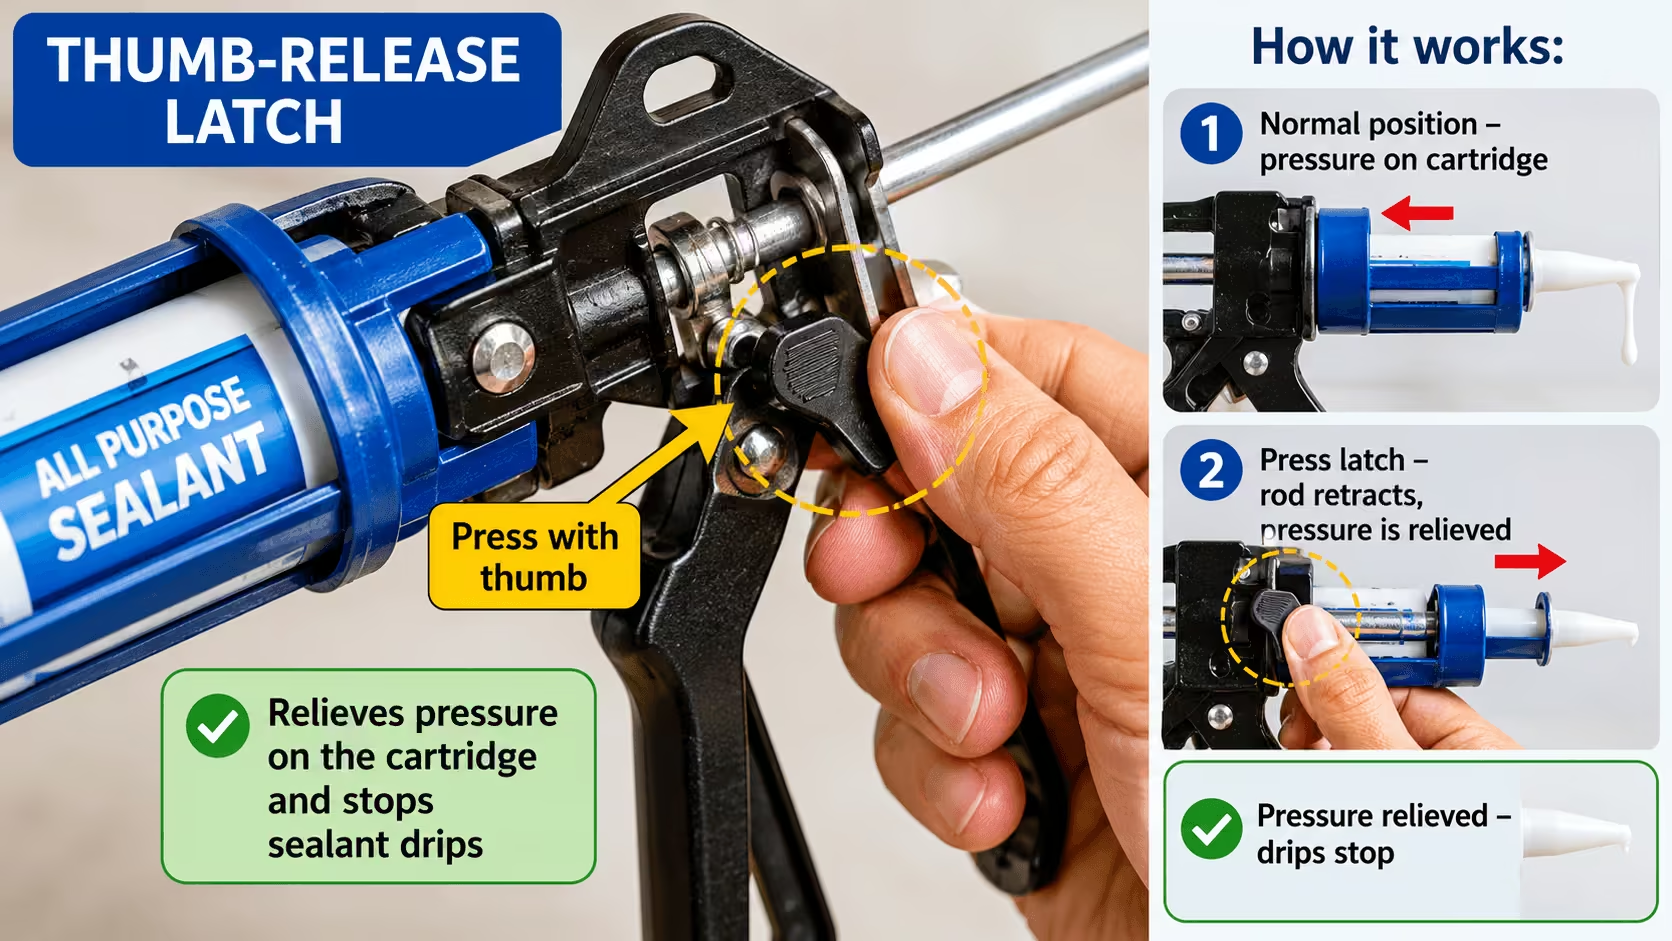
This happens because most manual caulking guns do not automatically retract the plunger when the trigger is released. You have to press the thumb-release latch at the back of the gun to relieve the pressure. Experienced users develop the habit of pressing the release immediately after each bead, but newer tradespeople and first-time users often forget.
A dripless caulking gun solves this problem mechanically. These models include a spring-loaded release mechanism that automatically retracts the plunger slightly when the trigger is let go, stopping the flow of sealant without any extra action from the user. For high-volume work like window installation or bathroom sealing, a dripless model eliminates the most common source of wasted material.
Mistake 2: Cutting the Nozzle Wrong
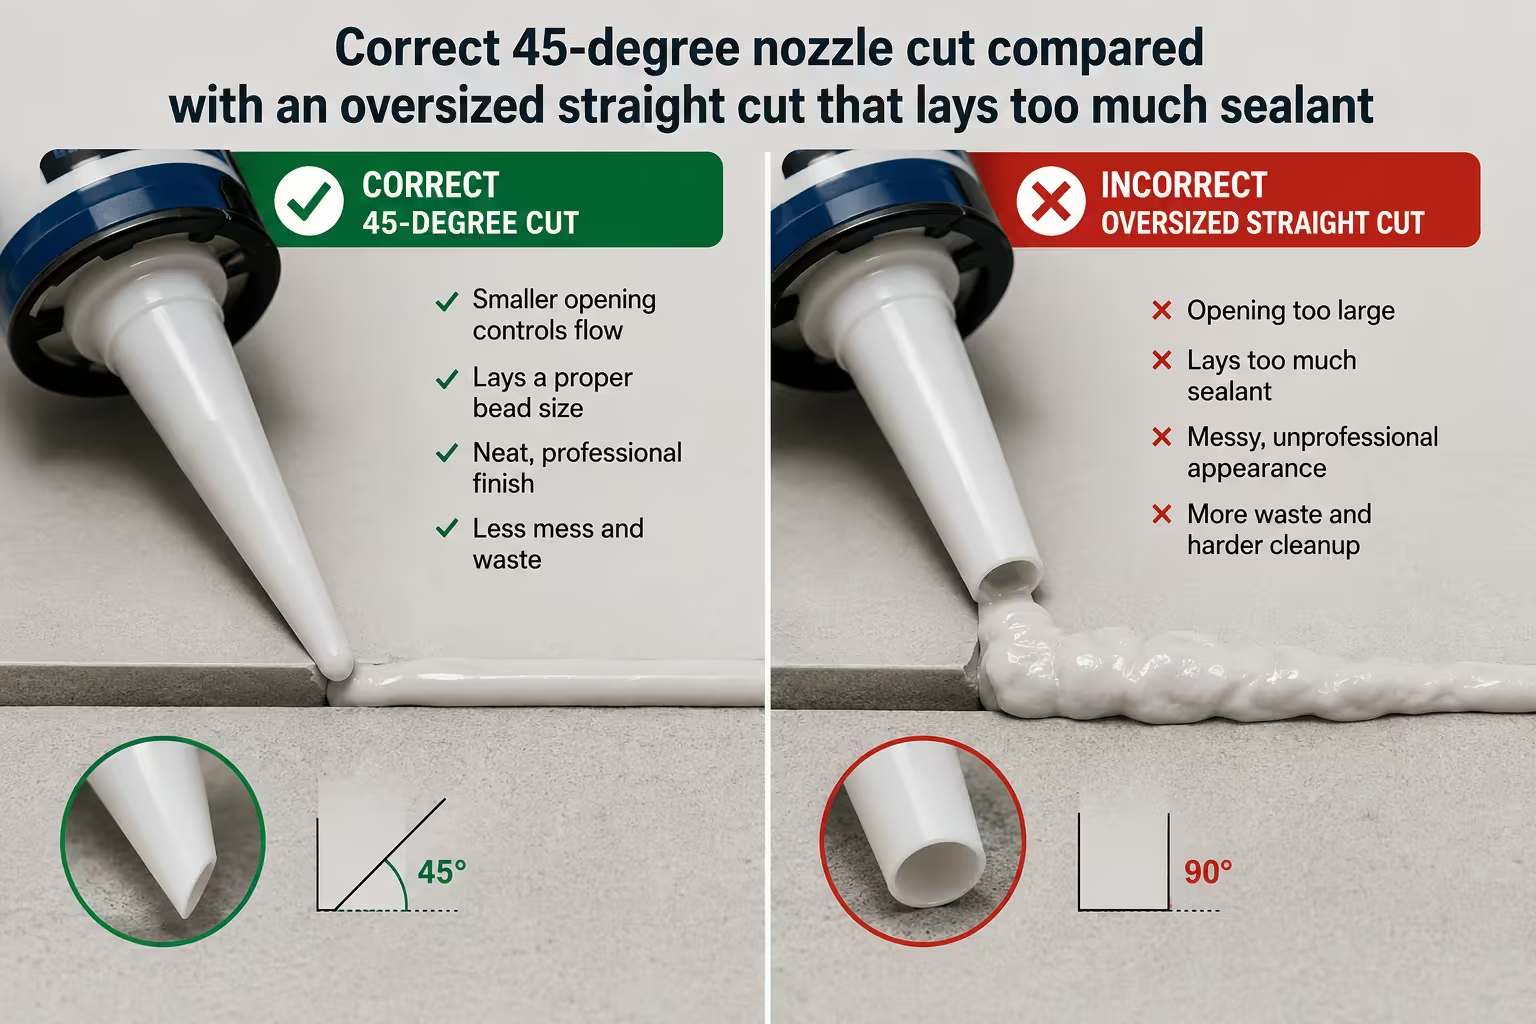
The nozzle on a sealant cartridge is designed to be cut to a specific angle and width before use. The two most common cutting errors are cutting too much off the tip and cutting straight across instead of at an angle.
Cutting too much creates a wide opening that deposits more sealant than the joint needs. You end up with excess material that has to be wiped off, which wastes sealant and creates a mess. Cutting straight across instead of at a 45-degree angle makes it harder to control the bead width and angle as you move along the joint.
The correct approach is to cut the tip at a 45-degree angle, starting with a small opening. You can always cut more if the bead is too thin, but you cannot put material back once the opening is too wide. For most standard 300ml cartridges used in construction sealing, a tip opening of 3 to 5 millimeters works well for window, door, and bathroom joints.
Mistake 3: Pushing Instead of Pulling the Gun
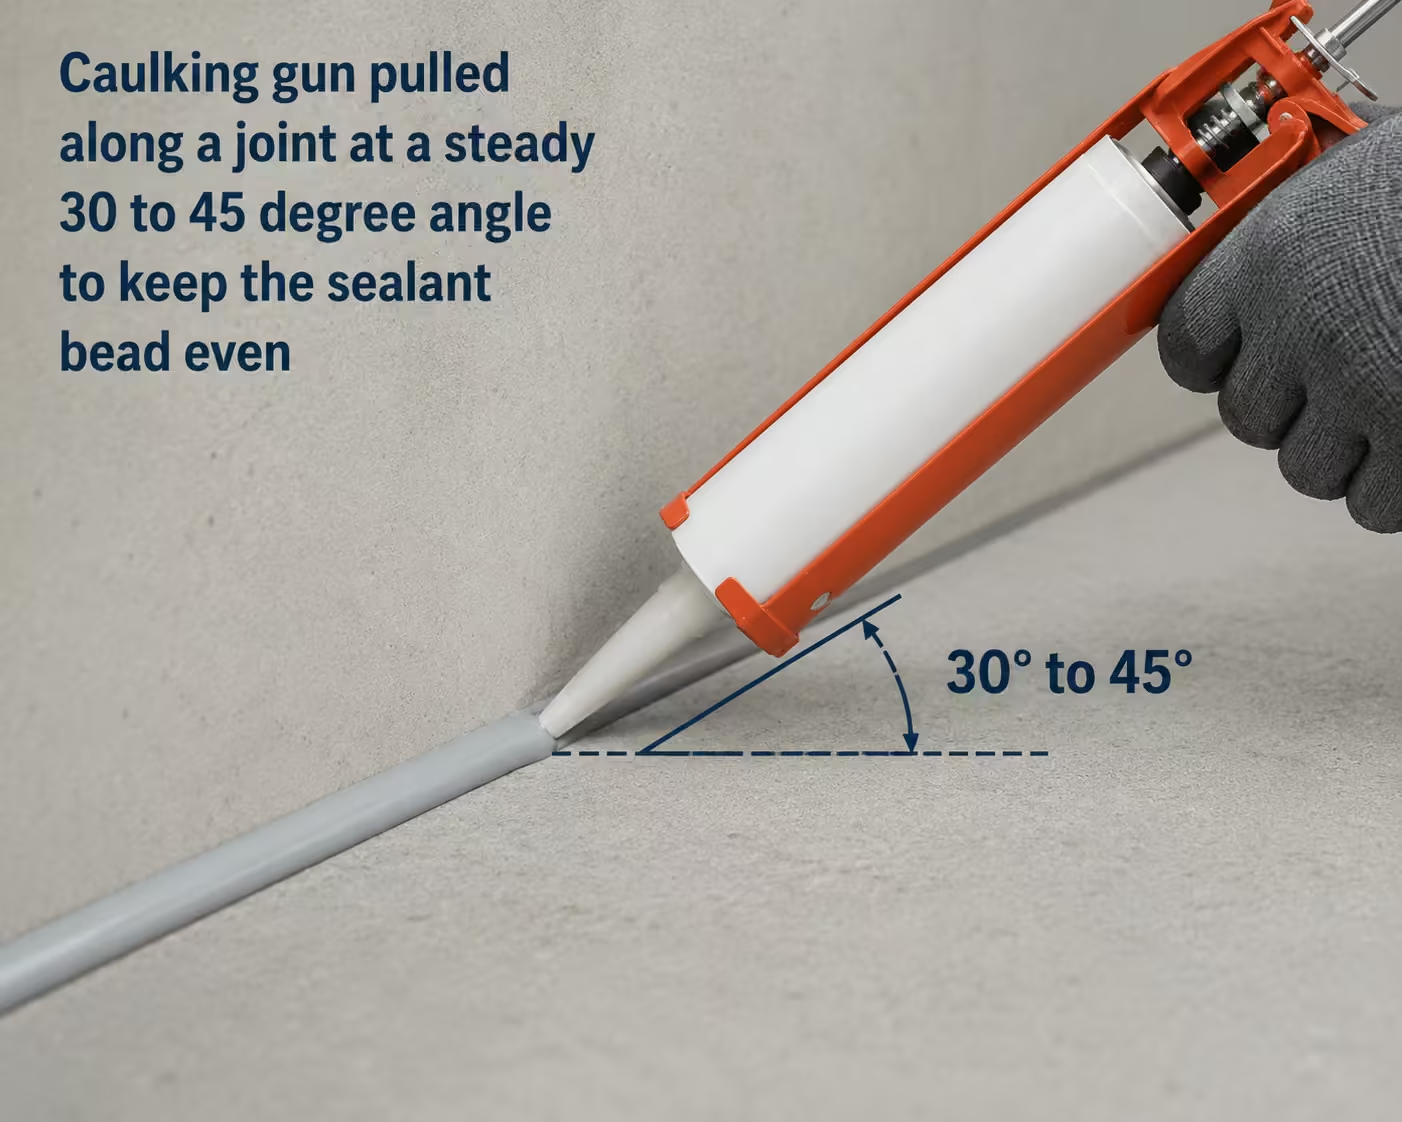
This mistake is surprisingly common among tradespeople who learned caulking on the job without formal training. Pushing the caulking gun forward along the joint causes the nozzle to dig into the bead, creating uneven lines and forcing sealant into gaps at inconsistent pressure.
Pulling the gun backward along the joint keeps the nozzle ahead of the bead, allowing the sealant to flow naturally into the joint. The gun should be held at a consistent angle — typically between 30 and 45 degrees — and moved at a steady speed. Rushing or pausing mid-bead creates visible ridges and valleys in the finished seal.
Users on trade forums confirm that bead control depends entirely on consistent trigger pressure and travel speed. A thin, consistent bead followed by a smooth wipe with a wet finger or finishing tool produces the cleanest result. Once you develop the pull-back rhythm, you spend less time reworking joints and use less sealant per meter of finished bead.
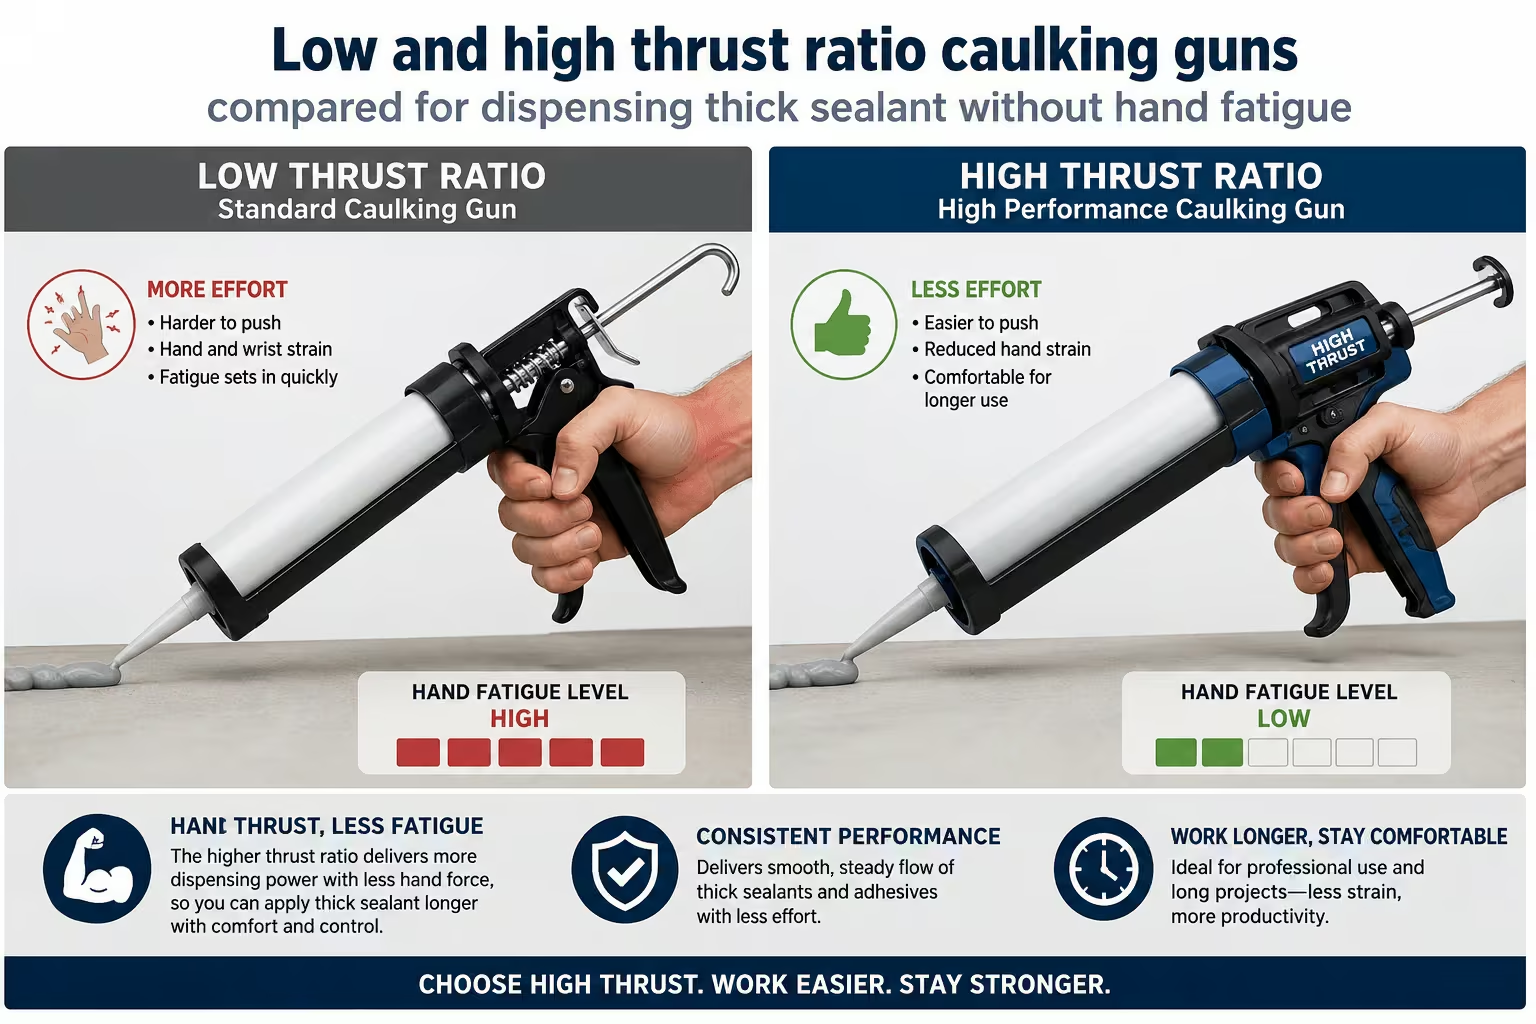
Mistake 4: Using the Wrong Thrust Ratio for the Material
Thrust ratio determines how much force the caulking gun applies to the cartridge plunger relative to the force you apply to the trigger. A low thrust ratio — such as 10:1 — works fine for thin sealants like latex caulk, but it requires significant hand force when you try to push thick materials like polyurethane, construction adhesive, or high-viscosity silicone through the nozzle.
When the thrust ratio is too low for the material, the operator has to squeeze the trigger much harder, which causes hand fatigue and makes it difficult to maintain consistent bead pressure. The result is uneven application and wasted sealant. Choosing a gun with the right thrust ratio for the material eliminates this problem at the source.
For standard 300ml cartridge sealants used in construction and industrial applications, a thrust ratio between 18:1 and 26:1 handles most silicone, acrylic, and polyurethane products without excessive hand force. The single component caulking guns from CaulkMFG are available in both 1:18 and 1:26 thrust ratio models, allowing buyers to match the gun to the specific sealant viscosity their crews work with most often.
Mistake 5: Skipping Surface Preparation
Applying sealant over a dirty, dusty, or wet surface is one of the fastest ways to create a joint that fails. Sealant needs a clean, dry, and dust-free surface to bond properly. Old caulk, paint residue, construction dust, and moisture all prevent adhesion, which causes the seal to pull away from the joint within weeks or months.
The preparation does not need to be time-consuming. A quick wipe with a damp cloth to remove dust, a scraper to remove loose old caulk, and a few minutes of drying time are usually enough. For bathroom and kitchen applications, a degreasing wipe removes soap residue and oils that interfere with silicone adhesion.
Skipping this step is especially common on fast-paced renovation projects where crews are trying to finish multiple rooms in a day. But the rework cost of a failed seal — removing the old bead, re-prepping the surface, and re-applying — takes far more time than the 30 seconds of preparation that would have prevented it.
How the Right Hand Caulking Gun Reduces Mistakes
Many of these caulking gun mistakes are avoidable simply by using a gun that is designed for the job. A reinforced frame prevents flex under pressure, which keeps the plunger aligned and reduces uneven dispensing. A smooth thrust rod ensures consistent pressure throughout each bead. An ergonomic trigger and handle design reduces hand fatigue during long working hours, which helps maintain bead quality from the first joint to the last.
For distributors and procurement teams evaluating manual caulking guns for wholesale supply, the combination of thrust ratio options, dripless release mechanisms, and build quality directly affects how well their end customers can avoid these common errors. The CaulkMFG single component gun product page shows the available model specifications including thrust ratios and frame materials.
FAQ
How do you release a caulking gun after use?
After finishing a bead, press the thumb-release latch located at the back of the caulking gun. This releases the pressure on the plunger and stops the sealant from continuing to flow. On standard ratchet-rod guns, this step is manual and must be done each time you pause or finish a line. Dripless caulking guns perform this release automatically when the trigger is let go, which eliminates the dripping problem for users who forget the manual release.
Why is my caulking gun so hard to squeeze?
A caulking gun that is difficult to squeeze usually means the thrust ratio is too low for the material you are dispensing. Thick sealants like polyurethane and high-viscosity construction adhesives require higher thrust ratios — typically 18:1 or 26:1 — to push material through the nozzle without excessive trigger force. Cold temperatures also increase sealant viscosity, making the gun harder to operate. Using a gun with an appropriate thrust ratio for the material, or warming the cartridge slightly in cold conditions, reduces the required trigger force.
What thrust ratio should I use for thick sealants?
For standard cartridge sealants, a thrust ratio between 18:1 and 26:1 handles most silicone, acrylic, and polyurethane products. Lower thrust ratios around 10:1 work for thin latex caulks but require too much hand force for construction-grade materials. If you are working with particularly thick adhesives or operating in cold weather, the higher end of that range — 26:1 — provides the smoothest dispensing with the least hand fatigue.
Is it better to push or pull a caulking gun?
Pulling the caulking gun backward along the joint produces a cleaner, more consistent bead. When you pull, the nozzle leads the sealant flow and the gun angle stays consistent. Pushing the gun forward tends to drive the nozzle into the bead, creating uneven pressure and messy lines. Hold the gun at a 30 to 45 degree angle, maintain steady trigger pressure, and pull at a consistent speed for the best results.
Can I use a sausage pack gun instead of a cartridge caulking gun?
Sausage pack caulking guns use 400ml or 600ml foil-pack sealants instead of rigid cartridges. They are designed for larger-volume jobs where changing cartridges frequently would slow down work. A sausage gun is not a direct replacement for a cartridge gun — they use different loading mechanisms and different sealant packaging. If your crews work through multiple tubes per day on large sealing projects, a sausage gun can improve efficiency. For standard construction sealing with 300ml cartridges, a single component cartridge gun remains the most practical choice.